So you’ve purchased our parametric HueForge frame design – great choice! This guide will walk you through customizing the frame dimensions to fit your specific needs. Don’t worry, it’s easier than you might think.
What You’ll Need
- Autodesk Fusion 360 (free for personal use/hobbyists)
- Our HueForge Frame .f3d design file
- About 5 minutes
Opening Your Design File
- Launch Fusion 360
- Click File → Open
- Navigate to where you saved the HueForge_Frame.f3d file
- Double-click to open it
The frame design will load in the viewport, and you’re ready to customize!
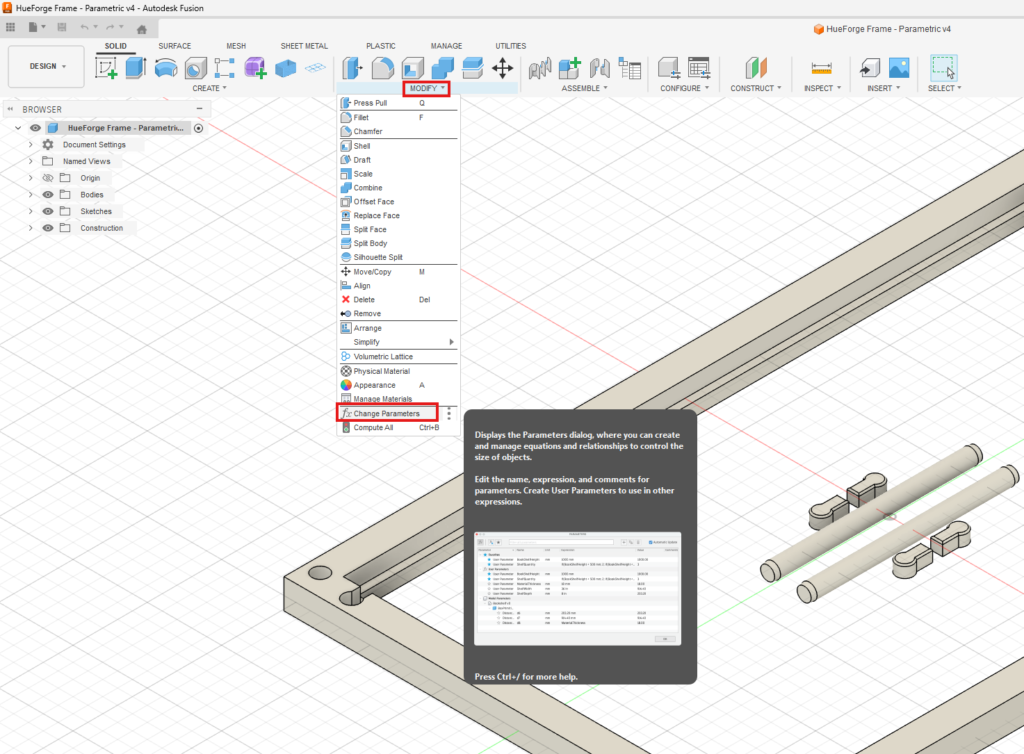
Accessing the Parameters
This is where the magic happens. Parameters are the “smart” values that control all the dimensions in the design.
- In the top menu, click Modify
- Select Change Parameters from the dropdown menu
- A dialog box will appear showing all the customizable values
Understanding the Parameters
You’ll see a list of parameters with their current values. Here are the ones you’ll want to adjust:
Primary Parameters
FrameHeight – The height of your HueForge print
- Common values: 100mm, 150mm, or 200mm
- This should match the size you created in HueForge
FrameWidth – The width of your HueForge print
- Common values: 100mm, 150mm, or 200mm
- For square prints, this matches the width
- For rectangular prints (like 100x150mm), set this differently
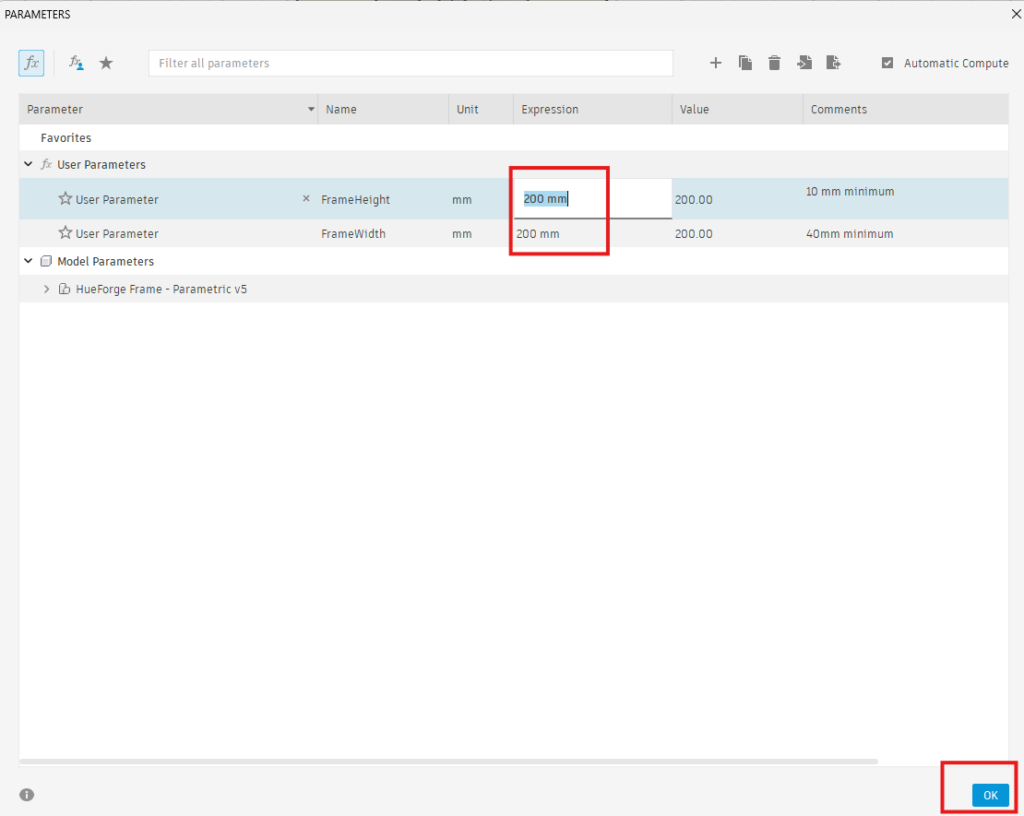
Modifying the Values
- Click on the value you want to change in the “Expression” column
- Type your new value (include “mm” for millimeters)
- Press Enter or click outside the field
- The design will update automatically in the viewport
Pro tip: Change one parameter at a time so you can see how each affects the design.
Common Configurations
Here are some popular setups to get you started:
Coaster Frame (Small)
- FrameWidth: 100mm
- FrameHeight: 100mm
Standard Wall Art (Medium)
- FrameWidth: 150mm
- FrameHeight: 150mm
Large Display Piece
- FrameWidth: 200mm
- FrameHeight: 200mm
Rectangular Print
- FrameWidth: 150mm
- FrameHeight: 200mm
Exporting Your Custom Frame
Once you’re happy with your customized frame:
- Click File → Export
- Select your preferred format:
- STL – Most common for 3D printing
- 3MF – Better for preserving colors and details
- Choose your save location
- Click OK
Your custom frame is now ready to slice and print!
Troubleshooting
The design looks broken after changing a parameter
- Try setting the value back to the default
- Make sure you included “mm” in your measurement
- Extremely large or small values may cause issues
The frame doesn’t fit my print
- Double-check your HueForge print dimensions
- Account for any borders you added in HueForge
Fusion 360 is running slowly
- Close other programs to free up memory
- Save your work and restart Fusion 360
- Very large parameter values can slow down regeneration
Still Need Help?
We’re here for you! If you run into any issues or have questions about customizing your frame:
Email us: support@tinkerz.net
Please include:
- A description of what you’re trying to achieve
- Screenshots if applicable
- The parameter values you’re using
We typically respond within 24 hours on business days.
Tips for Success
- Start with standard sizes – The 100mm, 150mm, and 200mm presets work great for most users
- Match your HueForge settings – Check your HueForge project file for exact dimensions
- Test print first – If you’re unsure, print at smaller size as a test before committing to a large frame
- Keep the source file – Save your customized .f3d file so you can make more frames with the same settings later
Want to Learn More?
This parametric frame design is just the beginning. By understanding parameters in Fusion 360, you can customize countless designs and even create your own parametric models.
Check out these resources:
Happy printing!
Leave a Reply
You must be logged in to post a comment.